How To Point Your Domain From Namecheap To Instago.ai
If you’ve bought a domain from Namecheap and want to use it with Instago.ai, this guide will show you exactly how to set it up. We’ll walk you through each step so your domain points to your Instago.ai site without any hassle.
Step 1: Log in to Namecheap
Open this link:
https://www.namecheap.com/myaccount/login.aspx
Step 2: Go to Your Domain List
From the left-hand sidebar, click Domain List.
You will see a list of all domains you own.
Click the Manage button next to the domain you want to connect to Instago.ai. 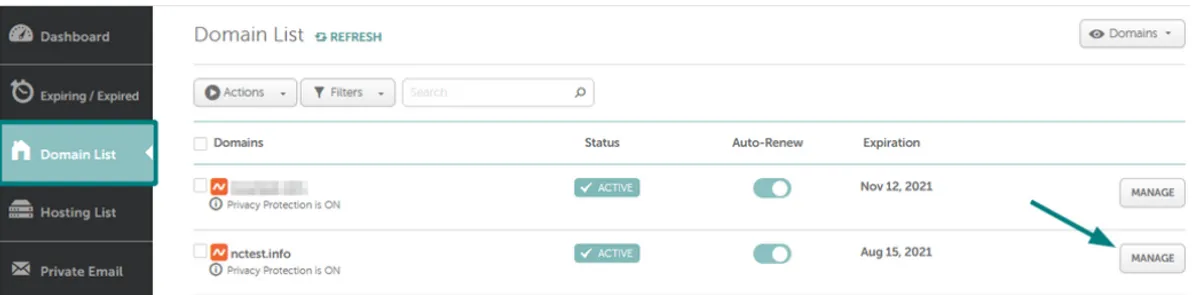
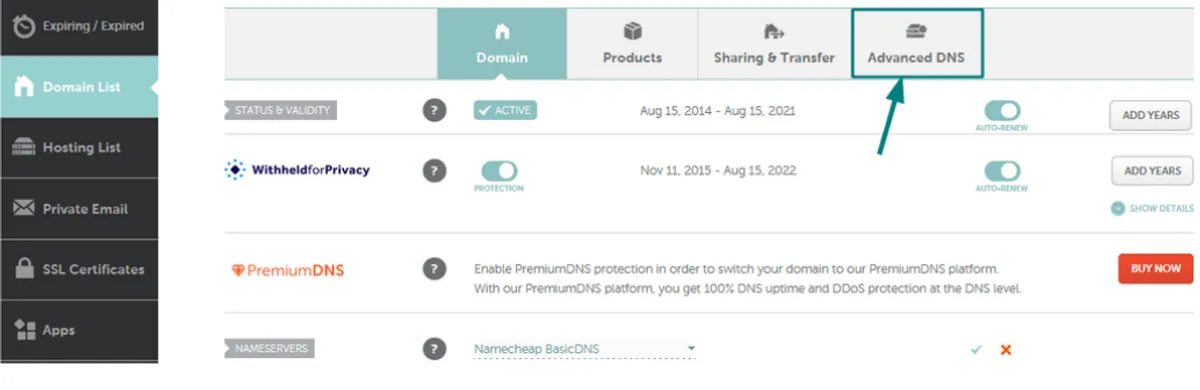
Step 3: Open Advanced DNS Settings
At the top of the page, click the Advanced DNS tab.
Step 4: Add New DNS Record
Scroll down to the Host Records section.
Click the red Add New Record button.
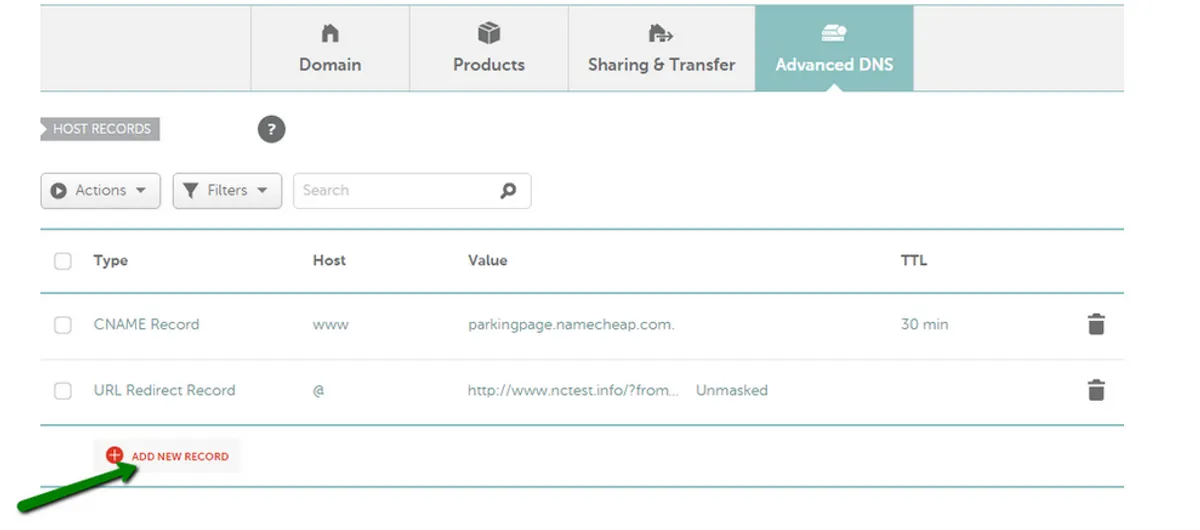
Now add three new DNS records with the following details:
Type | Host | Value | TTL |
A Record | @ | 15.204.232.177 | Automatic |
AAAA Record | @ | 2604:2dc0:101:200::1475 | Automatic |
CNAME Record | www | Automatic |
Please note the dot at the end of yourdomain.com. - it should be there.
Delete the “URL Redirect Record” if it exists.
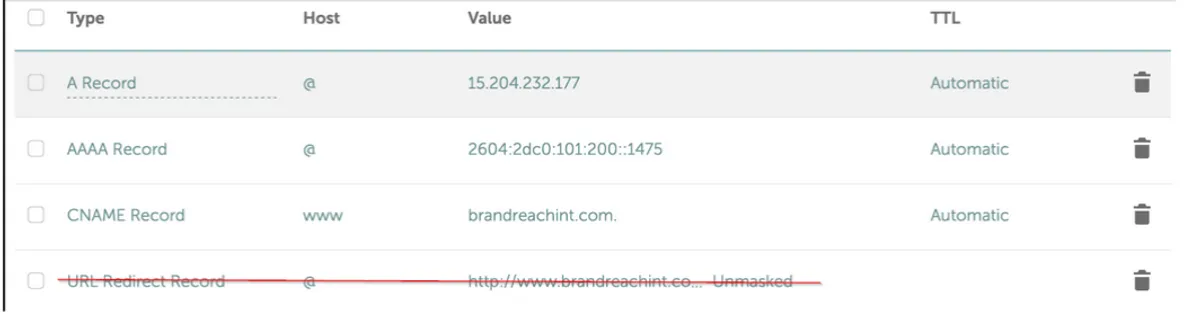
Replace yourdomain.com with your actual domain name (without https://).
After adding the records, click Save All Changes.
Step 5: Attach Your Domain in Instago
Go to your Instago Project Settings.
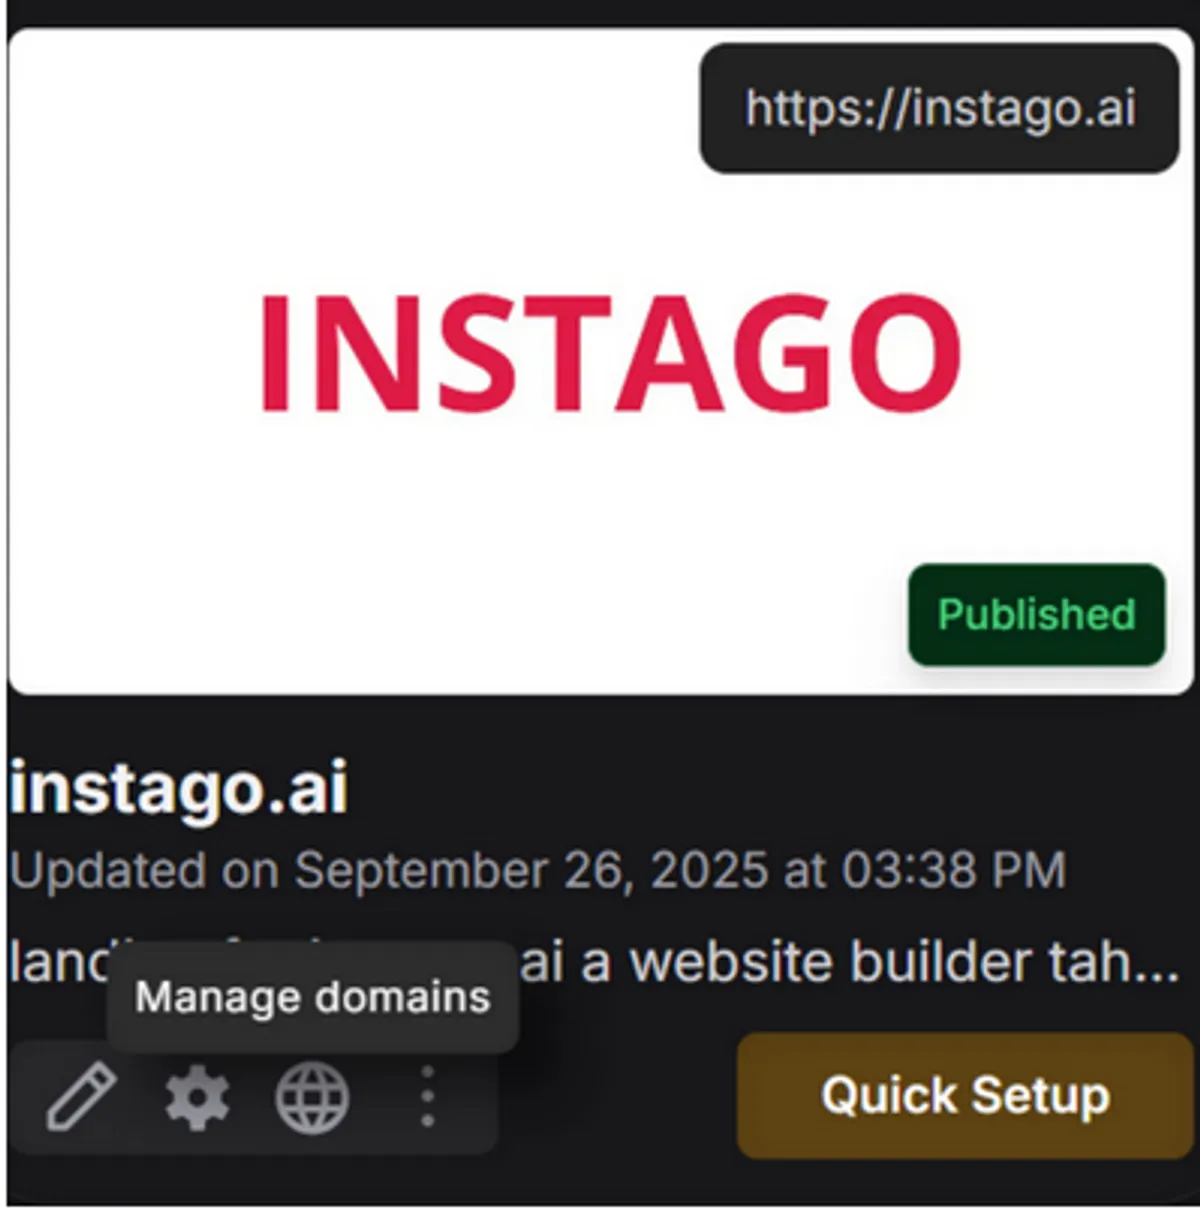
Enter your domain name (e.g., yourdomain.com) and click Attach.

Wait for DNS Propagation
DNS changes may take anywhere from 1 to 24 hours to propagate across all global servers. You can check the propagation status in the next step or stop here.
Verify Your DNS Setup
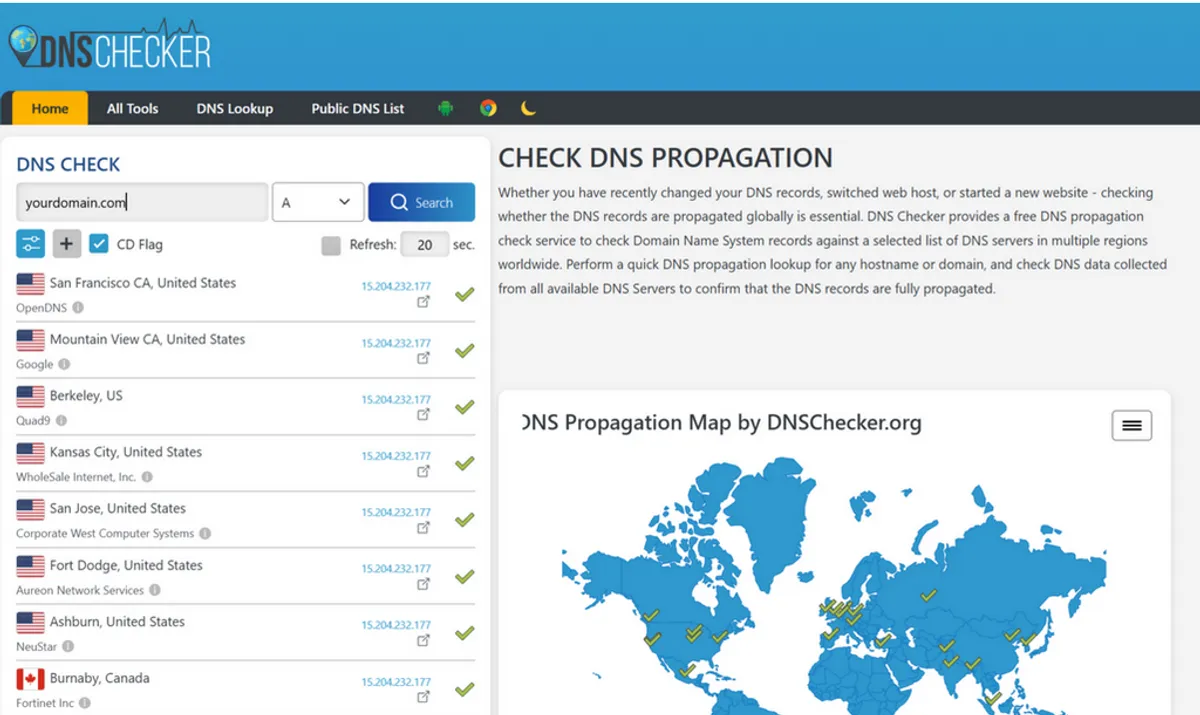
If you would like to ensure that everything was set up properly, you can go to https://dnschecker.org/ and enter your domain name.
For more information, refer to Namecheap’s official guide:
How to Connect a Domain to a Server or Hosting (via IP)