How to Add Your Website to Google Search Console?
Are you struggling to get your site noticed on Google? Many websites miss out on valuable traffic simply because their pages aren’t properly indexed.
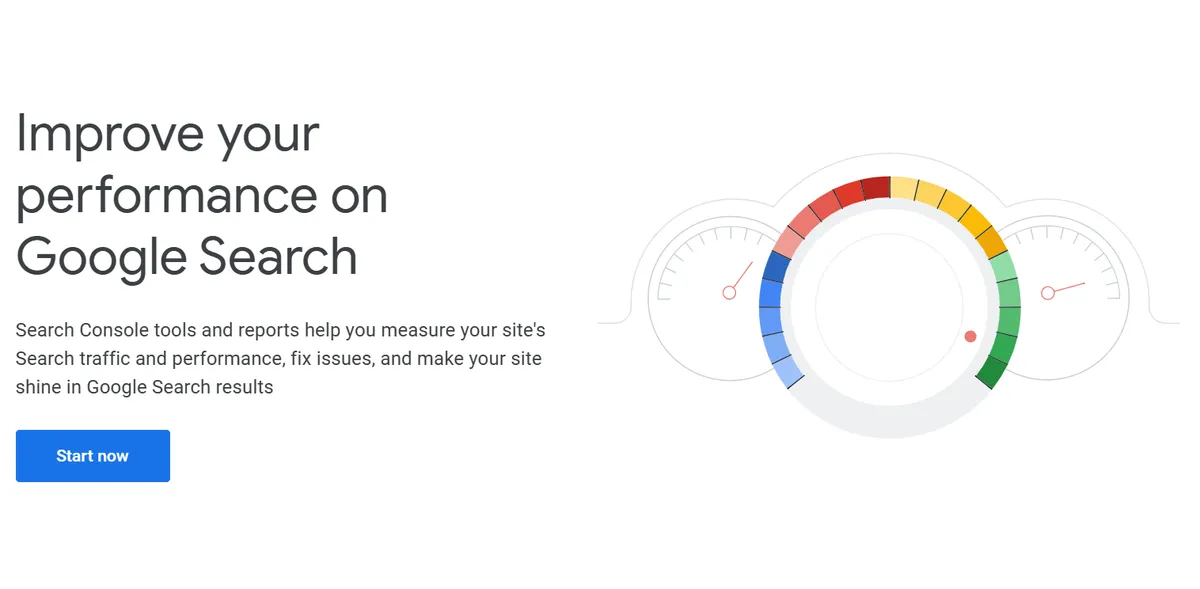
Google Search Console provides powerful, free tools for any website owner. By adding and verifying your site, you give Google direct access to your pages - improving their discoverability and search ranking potential.
Step 1: Create a Google Account
You need a Google Account to use Google Search Console. If you already manage a Gmail inbox, YouTube channel, or Google Analytics, you’re all set - no extra registration required.
Don’t have one yet? Creating a free account takes just a few minutes and unlocks vital tools for SEO and website verification.
Step 2: Ensure that your website is accessible
Before you begin the submission process, ask yourself: Can Google actually access your site? If your website isn’t live or is blocked by technical issues, Google won’t be able to crawl or index your pages.
Start by visiting your homepage in a private browser window. Confirm all major pages load correctly without errors. If you encounter broken links or maintenance messages, fix them first.
Step 3: Go to Google Search Console
To launch Search Console, go to search.google.com/search-console. Sign in with your Google Account credentials. This step gives you access to submit your website and monitor Google Indexing status right away.
Step 4: Type you domain name and click "Continue"
Begin by typing your domain and clicking the Continue button. Enter your site’s complete name, without https://. Accurate entry here ensures no data gaps later.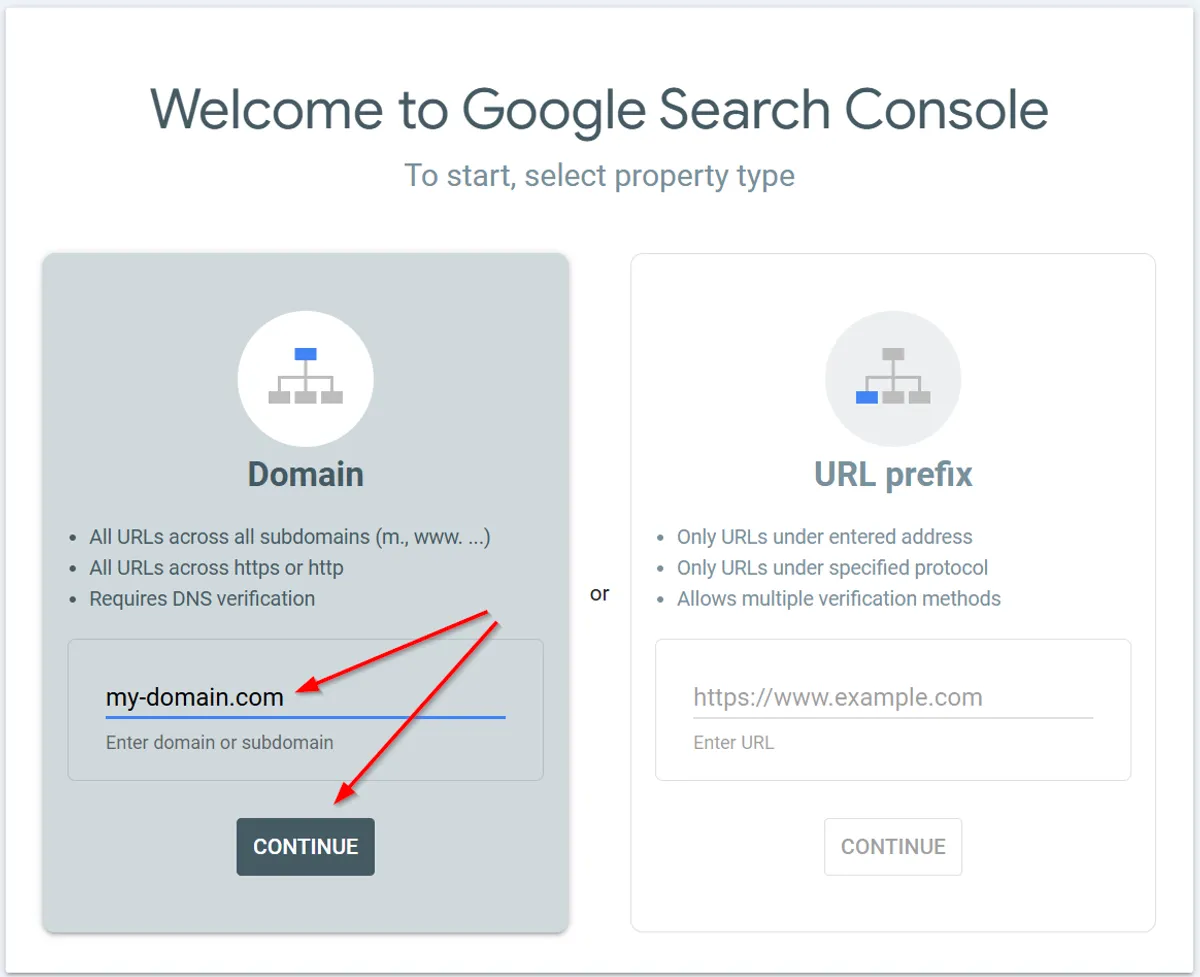
Step 5: Add TXT record to your domain
Once you submit your page, you're almost done - now add a TXT record to confirm that you own your domain. Add the google-site-verification value below to your DNS record (see below).
Step 6: How to add TXT record?
Go to your domain provider where you purchased your domain, then look for the DNS tab and click the "Add New Record" button. If you purchased your domain with Instago, you can reach out to us via chat, and we will help you add it.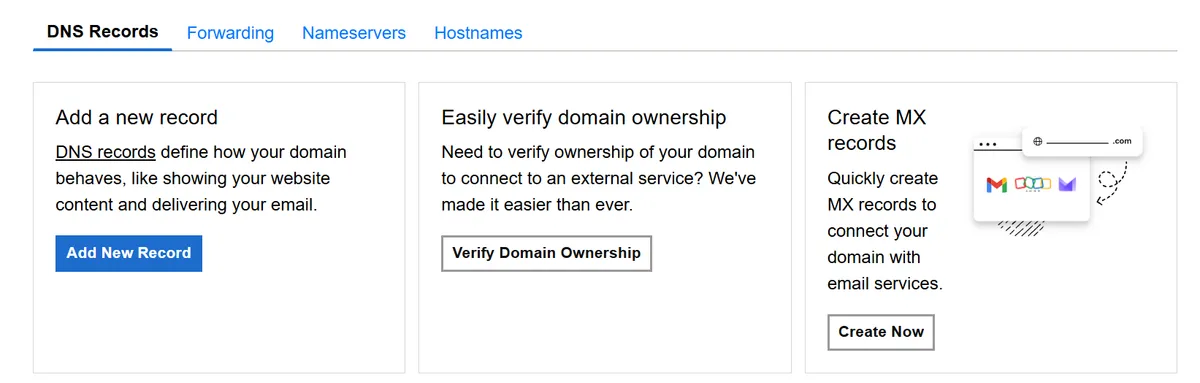
Select TXT record type, fill the name field with google-site-verification, enter the value provided by Google Search Console, and click Save.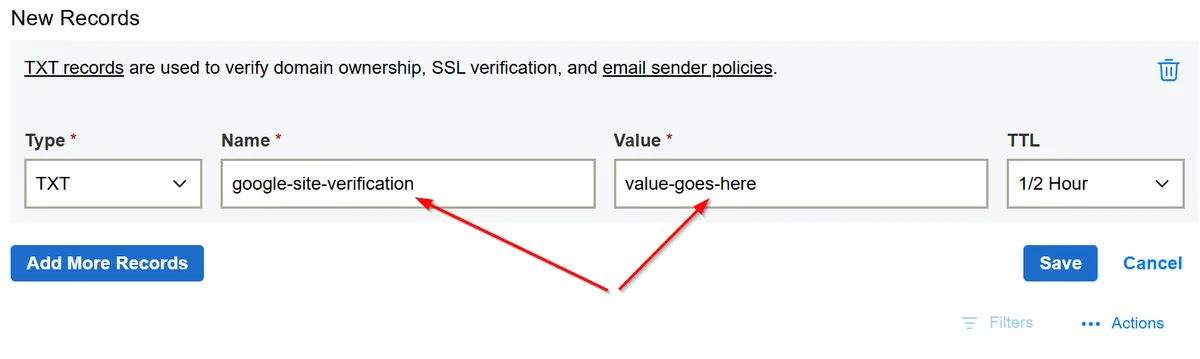
Step 6: Optional - submit your XML sitemap
An XML sitemap acts as a roadmap of your website, showing Google which pages matter most for indexing. Without submitting one, important content may be missed or crawled slowly.
Most platforms - our Instago, WordPress, Shopify, and Wix - automatically generate a sitemap at /sitemap.xml. Confirm its presence by visiting yourdomain.com/sitemap.xml in your browser.
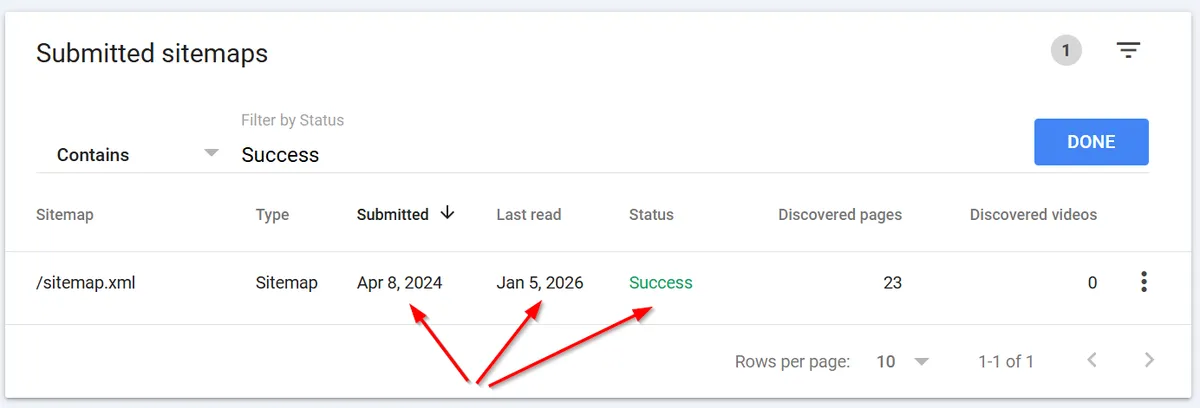
Once Google Search Console confirms your site ownership, go to the Sitemaps section in the dashboard. Paste your full sitemap URL (for example, https://yourdomain.com/sitemap.xml) and click Submit.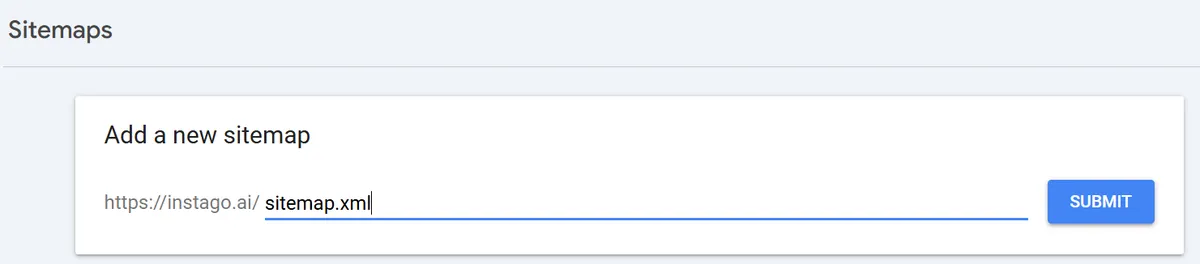
This helps Google index your new and updated pages faster.
Our platform automatically submits all new pages to google and updates sitemap.xml for you
Step 7: Optional -request indexing for individual pages
Launching a new blog post or making big changes to key pages? Use Google Search Console’s URL Inspection Tool: https://search.google.com/search-console?action=inspect to alert Google right away - no more waiting weeks for discovery!
Paste your page’s full URL into the tool. Then, click Request Indexing. This prompts an immediate crawl attempt and may speed up how quickly your content appears in search results.
If Google repeatedly declines to index a URL, review crawl errors or site quality flags inside Search Console’s Coverage report.
At Instago we automatically submit all your new pages to Google once you click Publish button.
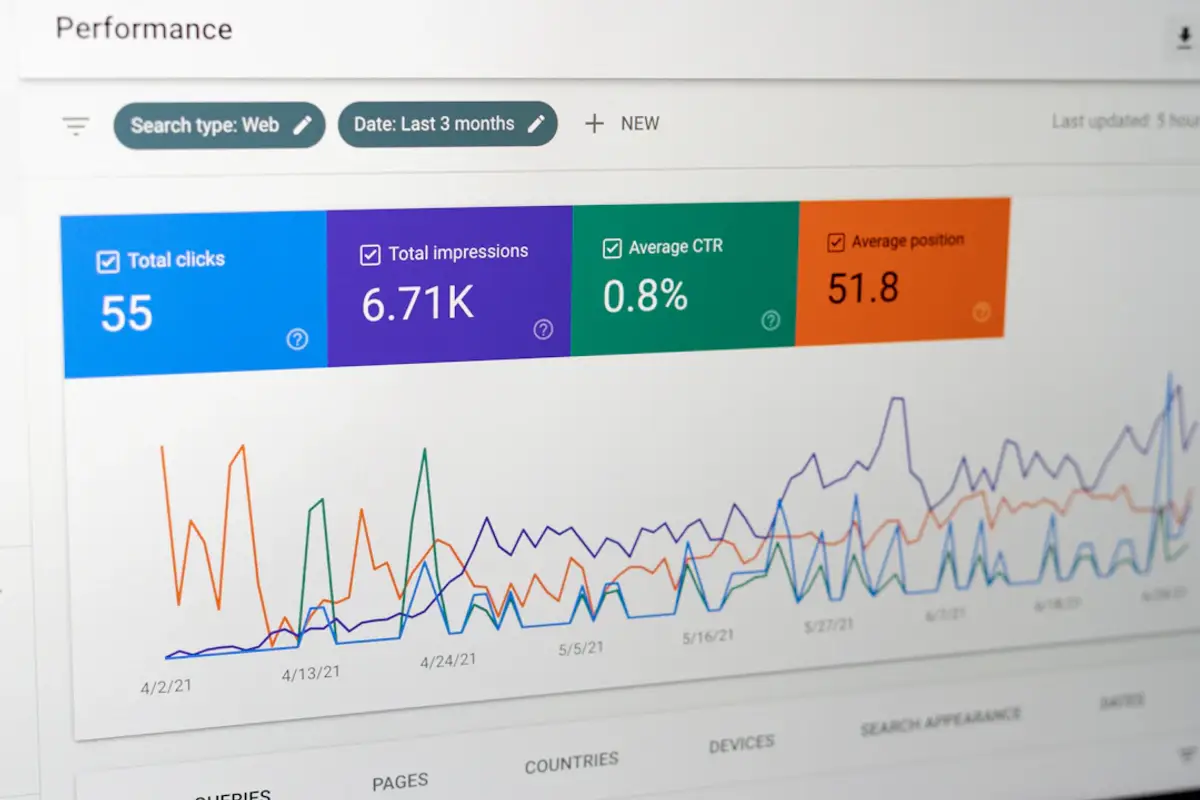
Step 8: Optional - track website performance
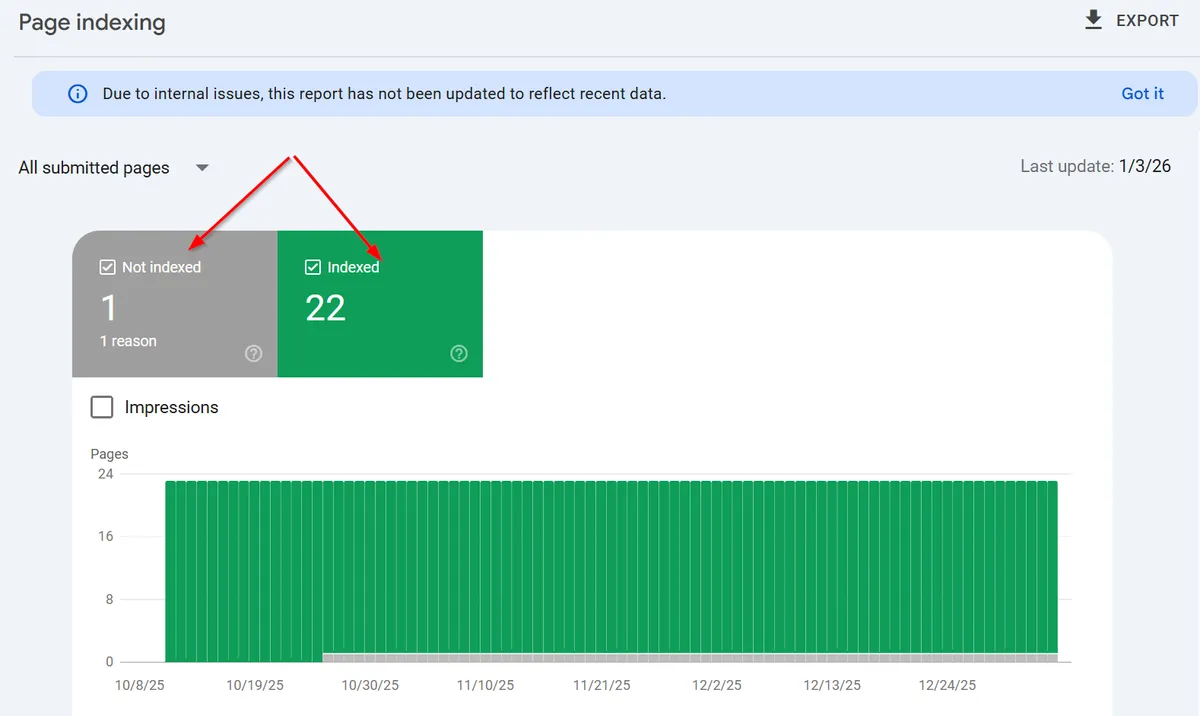
Google Search Console gives you real-time insights into which pages are indexed, where errors emerge, and how users interact with your site.
Use the Coverage report to spot invisible pages - those that aren’t indexed but should be. The Performance report uncovers which search queries drive the most visitors and highlights underperforming keywords that need your attention.
Imagine you notice one of your main service pages receives a spike in clicks, but impressions remain flat. This could reveal a new ranking position or demand for that topic—giving you a window to further optimize content and internal links.
Make a habit of checking Search Console. Prioritize fixing errors and capitalizing on pages with growth potential. Consistent monitoring enables you to catch and address SEO issues before they impact your website’s discoverability.
Step 9: Optional - diagnose and resolve indexing problems
Crawled – Currently Not Indexed: Google discovers your page, but excludes it from results. This can happen if the content is too similar to existing articles, or offers little value. Remedy this by adding unique insights, answering new user questions, and avoiding thin or boilerplate pages.
Submitted URL Marked ‘Noindex’: When a
noindextag is present, Google cannot add the page to their index—even if you want it there. Audit all templates and CMS settings, particularly after redesigns or migrations, to ensure important pages are set to be indexed.Blocked by robots.txt: Accidentally blocking Googlebot in
robots.txtwill keep entire sections hidden. Use the robots.txt tester in Google Search Console to diagnose which files or directories are affected and adjust allow/disallow rules appropriately. Never block public-facing pages you want found in Google Search.Soft 404 Errors: These occur when a page exists but does not deliver useful information - for example, landing on a blank page. Instead, configure your server to return proper 404 or 410 status codes for removed content, and ensure live pages are helpful and clearly focused.
Redirect Loops and Broken Redirects: Multiple or faulty redirects, especially after HTTPS migrations, can prevent Google from accessing content. Test your major redirect chains using browser developer tools, and fix loops to maintain a crawlable, indexed site structure.
Routinely review Search Console’s error and coverage reports. Addressing these common issues quickly will help your website maintain visibility and organic traffic in Google Search.
Step 10: Content Strategies for Faster Google Indexing
Getting your site indexed quickly isn’t just about submitting it to Google Search Console. Search engines favor pages that are easy to understand and provide clear value to users.
Start by focusing on your page structure. Break up text with descriptive headings and use targeted keywords naturally throughout the content.
Create meaningful title tags and detailed meta descriptions for every page. These elements are often the first thing a user and Google sees.
Organize each page with logical H1, H2, and H3 headings. Use main keywords and location you target where relevant to make your topic and focus unmistakable.
Link related pages together using internal links. Our AI Blogger automatically embeds your existing articles into new ones. You can also for instance, connect your service pages to related blog content, boosting both crawlability and SEO strength.
Keep your URLs concise and relevant. Avoid long, confusing names, as these can dilute search signals and harm Google Indexing.
Optimize site speed by compressing images, minifying code, and reducing unnecessary scripts- a slow site can hinder both crawling and ranking (we optimize images for you).
Always! add descriptive alt text to your images, helping both users with accessibility needs and search engines interpret your content.
Don’t forget technical steps: verify your website in Google Search Console, submit your sitemap, and regularly check for new crawl errors or indexing coverage issues.